
Most applicants reach the same fork at the start: use the phone app, or fill in the application online. A common sticking point comes next in the app, which is the moment the phone has to read the chip in the passport and it simply does not. This guide explains the difference between the two routes, what each needs, how the scan works, and what you can sensibly try when it fails. It reflects the published guidance as of 10 October 2026, and device requirements do change, so treat the numbers here as a snapshot.
The short answer: app or online?
- Use the app if you have a compatible phone and the person the ETA is for is with you. It scans the passport and the face directly.
- Use the online application if the person is not with you, if you cannot install or run the app, or if the app keeps failing. You will provide a photo of the passport and a photo of the face instead.
- Either way, the passport you apply with is the passport you travel with. The ETA is linked to it electronically.
- A submitted application cannot be edited. Mistakes usually mean applying again, so accuracy matters more than speed.
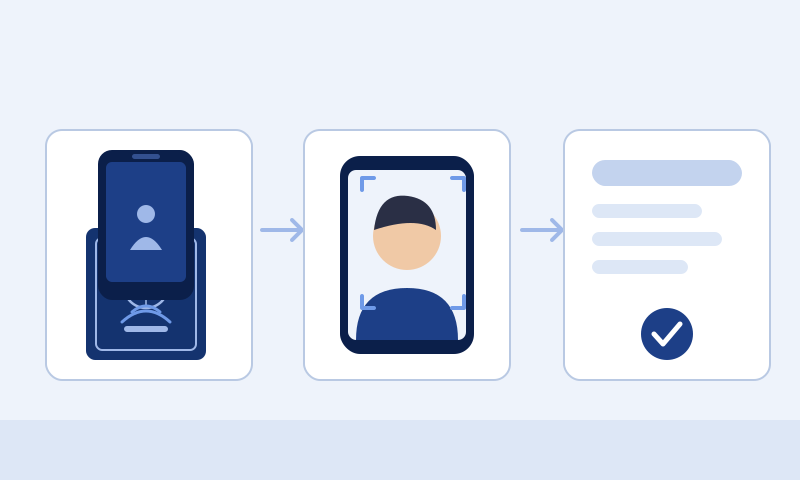
App versus online application
Both routes lead to the same decision, made by the same immigration authorities, and both result in an ETA linked to a passport. The difference is how the passport and face information gets captured.
| Situation | Route to use | Why |
|---|---|---|
| Applying for yourself, with a compatible phone | App or online | Either works. The app reads the chip in the passport directly. |
| Applying for someone who is with you | App or online | The app can scan their passport and face while they are beside you. |
| Applying for someone who is not with you | Online | The app needs the person present, so you use photos instead. |
| Your phone is too old or lacks a chip reader | Online | The app has minimum phone requirements. |
| The passport chip will not scan | Try the troubleshooting below, or apply online | The online route does not rely on a chip scan. |
| Applying for a child with you | App or online | Face scanning rules depend on the child’s age. |
Nothing in the published guidance suggests that one route is decided faster or more favourably than the other. The guidance also says you cannot get a faster decision by applying through another website or app. Choose on practicality, not on speed.
What to have before you start
The basics are the same whichever route you pick:
- The passport you will travel with. In the app it has to be the original passport, not a photocopy and not a digital version.
- An email address you can read. The decision is sent there, along with the reference number.
- A way to pay. The app accepts card payments and the usual phone wallets. Your bank may ask you to enter a code or approve the payment in its own app.
- Time and good light. The photo steps go smoothly in a bright room and badly in a dim corridor.
- Your answers ready. The questions cover your address, your job, any other nationalities, and criminal convictions, which you must describe in as much detail as you can.
For what counts as an acceptable passport page and photo, our requirements checklist goes into detail, and the UK ETA requirements guide covers who needs an ETA at all. Check those before you begin so that this article can stay on the practical steps.
Phone and app requirements
The published guidance gives specific minimums for each kind of phone, and they differ by platform. Because these can change, check the current wording in your phone’s app store listing as well.
| Phone | Requirements published | Notes |
|---|---|---|
| iPhone | iPhone 7 or newer, iOS 16 or later, about 179MB of free storage, and a connection by mobile data or WiFi | Check your version under Settings, General, About. |
| Android | Android 12 or later, about 165MB of free storage, a connection, and NFC | NFC is the contactless feature the app uses to read the passport chip. |
| All phones | Camera access | If the app does not ask for it, switch it on in your settings. |
Two further points from the guidance. The app is available in English only. And it describes phones: the sources reviewed for this article do not make a statement about tablets, so do not assume one will work. If you are unsure whether your Android phone has NFC, a useful test is whether you can pay with it contactlessly in a shop. If you can, it has NFC.
How passport scanning works
Applying in the app involves two separate passport steps, and mixing them up explains many failures.
Step one: photograph the photo page
You take a picture of the page with your photo and personal details. The app prompts you to adjust the phone, and the picture should include the whole page and not be blurry. If you struggle, the guidance suggests holding the passport and phone at arm’s length.
Step two: read the chip
Modern passports contain a small chip that stores the holder’s details. A passport that carries the chip symbol on its cover can be scanned by the app. The guidance for the chip scan is to remove any case or cover from both the passport and the phone, place the phone on top of the passport with the top of the phone near the middle, and wait. If the volume is up, you hear a beep when the passport has been recognised. If it is not recognised, move the phone around over the passport.
United States passports have a note of their own: if scanning the front fails, the guidance says to place the phone on the inside of the back cover. That detail is a reminder that the position of the chip reader varies between passports, so patience and small movements are part of the technique.
If your passport will not scan
Failing to read the chip is the most common reason people give up on the app. Work through the following in order.
Steps supported by the published guidance
- Take off every cover. Remove the passport cover or case, and the phone case.
- Check the passport has the chip symbol on the cover. Without it, the app cannot read it.
- Position the phone on the passport, with the top of the phone roughly over the middle of the passport, and keep it still.
- Move the phone slowly around the passport if it is not recognised, and listen for the beep.
- Try the back cover if you hold a United States passport and the front does not work.
- Check the camera permission if the camera will not start. Enable it in your settings.
- Fall back to the photo. If you cannot scan the passport, the app takes your details from the photo of the passport page instead. Read the extracted details against the physical passport.
- Switch to the online application if the app still fails. The guidance says to apply online if you have problems using the app.
General device checks (not part of the guidance)
These are common-sense measures for any app that uses the phone’s contactless reader, offered as general suggestions only. Restart the phone, make sure the phone’s system software is up to date, confirm that NFC is switched on in the settings of an Android phone, close other apps, and make sure you have the storage the app needs. None of these is a promise of a fix.
If the details the app extracts from the photo do not match the passport, the guidance says the application will be delayed or rejected, so check them carefully. See why an ETA application may be rejected or refused if you are unsure what each outcome means.
The face scan and photo step
This step is shorter than people expect, and it is worth keeping simple. In the app there are two face-related actions. First, a face scan, which confirms that a real person is applying. Second, a face photograph.
- Face scan. Hold the camera in front of the face until it completes. If you are applying for someone aged 10 or older, they need to be scanned. The guidance says the face of a child aged 9 or younger is not scanned.
- Face photo. The app tells you if the photo does not meet the photo requirements, and you can retake it before submitting.
- Special circumstances. You can still submit a photo that does not meet the requirements where there is a reason, such as a head covering worn for religious or medical reasons.
If you apply online instead, you supply a photo of the passport and a photo of the face, and a photo that does not meet the rules may lead to delay or rejection. We do not repeat the detailed photo standards here, because our requirements page sets them out in full.
Applying for someone else
You can apply on another person’s behalf, which matters for parents, partners, carers, assistants and anyone organising a group. The route depends on where they are.
- They are with you. You can use the app. You scan their passport, scan their face, and take their photo.
- They are not with you. Apply online. You need a photograph of their passport and a photograph of their face.
- Every traveller needs their own ETA, including babies and children. One application does not cover a family.
- Under 18. The application asks for contact details for someone with parental responsibility.
- Decisions can arrive separately for different people, even when you applied at the same time.
Our guide to UK ETAs for children, babies and families covers the family side in more depth, including how to handle several people at once.
Questions, payment and submission
After the scans, the application asks about your address, your job, any other nationalities, and criminal convictions. Describe convictions as fully as you can, including the type of offence, the date, and the sentence. Answer exactly and consistently: guessing or leaving something out can cause problems later, as our article on refused and rejected applications explains.
Payment is made inside the application, and the app shows the price in a local currency that you can change. We do not quote any prices here. After you apply, a decision usually arrives by email, often within a day, and can take up to three working days; our guide to how long a UK ETA takes covers waiting and what to do if no decision comes. The email contains your ETA reference number. Do not travel until you have the email confirming that you hold an ETA.
Once you hold an ETA, it is linked to your passport digitally, and you do not need anything else to show you have it. You can delete the app after you have finished applying.
What if the information is wrong?
This is where the rules are least forgiving, and it is worth knowing before you press submit.
- You cannot edit a submitted application. The decision-maker guidance states that once an application has been submitted it cannot be withdrawn, varied or amended, and that requests to do so should be refused.
- A new application is usually the answer. The application guidance says that if your application is rejected, or you need to change the details, you apply again. The fee is not refunded once you have applied.
- Details that do not match the passport can cause delay or rejection. That applies to the passport details the app extracts as much as to anything you type.
- A new passport means a new ETA. The ETA is valid only on the passport it was linked to. See our guide to ETA validity and new passport rules.
What the guidance does not clearly address is how a mistake spotted while your original application is still waiting should be handled. Because a second application should not be made casually, the cautious course is to read the information carefully before submitting rather than rely on correcting it afterwards. If you have already submitted something wrong and are unsure what to do, you can contact the immigration authorities’ enquiry service for ETA questions.
Common application problems
- Using a passport you will not carry. The ETA is tied to the document you scanned.
- Scanning through a case or cover. It often blocks the contactless read.
- Choosing the app for a person who is not there. That route needs them present.
- Ignoring a mismatch on the details screen. A wrong digit or letter can mean a rejection.
- Rushing the photo. The app flags a poor photo, so retake it rather than skipping the warning.
- Using an unsupported phone. If your phone is below the stated minimum, the online route is the practical choice.
- Mistyping the email address. The decision goes there and nowhere else.
- Submitting two applications. It does not speed anything up and adds cost.
Troubleshooting checklist
- Decide who the ETA is for and whether they are with you.
- Check the phone against the minimum requirements for its platform.
- Have the original passport, an email address and a payment method to hand.
- Remove the passport cover and the phone case before scanning.
- Photograph the whole photo page in good light.
- Scan the chip slowly, listening for the beep.
- If scanning fails, try the guidance steps, then consider the online route.
- Compare every extracted detail with the physical passport.
- Take a clear face photo and retake it if the app flags a problem.
- Answer the questions exactly, then review before you submit.
- Keep the confirmation email, and travel on the same passport.
Where an assistance service fits
UKETA.sg is an independent application-assistance service. It is not the UK Government, it does not run the app or the online application, and it does not decide any ETA. The app and the online application are routes you can use yourself. Some travellers prefer to have help preparing and submitting their application accurately, and our service and processing options page explains what that involves. Using an assistance service is optional, never required, and it cannot influence how or when the immigration authorities decide.
Frequently asked questions
Can I apply for a UK ETA on my phone?
Yes, with a compatible phone, through the app. If your phone is unsuitable or the app keeps failing, you can apply online instead.
Do I need a special phone to scan my passport?
An iPhone needs to be an iPhone 7 or newer running iOS 16 or later. An Android phone needs Android 12 or later and NFC. These are the published minimums at the time of writing, so check the current listing before you start.
What is NFC?
It is the contactless feature that lets a phone read a chip at very short range. If you can pay with your phone in a shop, it has NFC.
Can I use a tablet?
The published guidance describes phones and does not make a statement about tablets, so we cannot say that one will work. The online application is the safer alternative.
Why will my passport not scan?
Common reasons are a cover or case in the way, a passport without the chip symbol, the phone being held in the wrong position, or a phone without NFC. Follow the steps above, and try the online route if the problem persists.
Can I apply without scanning the chip?
If you cannot scan the passport, the app takes your details from the photo of the passport page. Check them carefully, because mismatched details can cause delay or rejection. You can also apply online.
Do children need a face scan?
The guidance says to scan the face of anyone aged 10 or older and not to scan the face of a child aged 9 or younger. A face photograph is still part of the application.
Can I apply for a relative who is overseas?
Yes, by using the online application with a photograph of their passport and of their face. The app needs the person to be with you.
Can I edit my application after I submit it?
No. Submitted applications cannot be amended or withdrawn. If details need to change, or the application is rejected, you apply again.
Is the app or the online route faster?
The guidance does not say that either route is decided faster. Decisions usually come by email within a day and can take up to three working days.
Do I need to keep the app after I apply?
No. The guidance says you can delete it once you have finished. Your ETA is linked to your passport digitally.
Does applying through UKETA.sg change how the ETA works?
No. The ETA is the same document linked to your passport, and the decision is made by the immigration authorities whichever route you use.